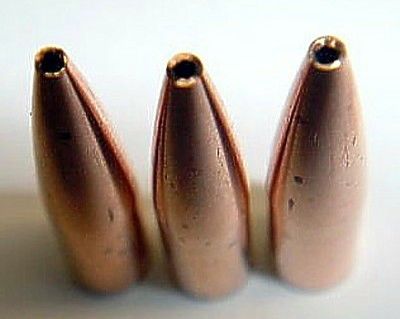
Montour Meplat Uniforming Tool Instructions
It is recommended that you check the base to ogive measurement using a comparator tool and sort differences in .001” increment lots. Keep these lots segregated throughout the entire meplat uniforming process and afterwards. This will ensure a more accurate over all length, meplat diameter and finished product.
1.) Place the correct caliber bullet in bottom end of body and gently push in until it stops. Do not use excessive force for this can damage the bullet. Slide the meplat cutter ( flat cutter ) into the 3/8” hole in opposite end of body until it rests on bullet tip. Slide one knurled stop collar onto shank of cutter. Using a piece of paper or feeler gauge between the body and knurled stop collar, set the desired amount of material to be removed. Generally .005” - .010” Tighten the set screw up on the flat portion of the shank. Remove cutter and apply a light coat of oil ( Imperial sizing die wax works great ) to the top end of body where the knurled stop will come in contact to prevent gulling. Gently re-insert the cutter until it rests on the bullet tip. With one finger apply gentle pressure to the base of the bullet while rotating the cutter clockwise to remove material from bullets meplat. When you feel the cutter stop cutting remove the cutter from meplat body. Remove the bullet to see if you removed enough material to clean up. If not, adjust knurled stop collar so more material is removed and repeat step 1. If enough material was removed to your satisfaction, clean out the body with either compressed air or a Q-tip. Replace bullet and move to step 2.
2.) Gently insert the center de-burring tool into 3/8” hole in body ( without knurled stop attached ) until you feel it rest on the bullet tip. With one finger gently apply pressure to the base of the bullet while rotating the center de-burring tool clockwise with little to no downward pressure. When first setting up center de-burring tool take a light cut with only a few rotations. Again, the knurled stop is not attached at this point. Your only trying to remove the burr inside the hollow point area and leave a slight 60 degree chamfer inside. Remove the bullet and inspect that you have removed enough material to your satisfaction. Clean out the body with either compressed air or a Q-tip and replace the bullet. If you are satisfied with the amount of material removed, gently slide the center de-burring tool back into the body until it rests on the bullet tip. Slide the knurled stop over the center de-burring tool shank and tighten the set screw up on the flat portion of the shank. Remove the center de-burring tool and apply a light coat of oil ( Imperial sizing die works great ) to the top end of the body where knurled stop will come in contact to prevent gulling. Replace the center de-burring tool and rotate it clockwise a few turns. Remove the center de-burring tool as well as the bullet. If enough material is removed to your satisfaction, meplat uniforming is complete. If not re-adjust knurled stop collar so more or less material is removed and repeat.
Once your knurled stop collars are set there is no need to remove the bullet between steps 1 and 2. You will need to clean out the inside of the body removing the small copper chops with either compressed air or a Q-tip before inserting a new bullet.
Check out Danny Reever's review on AccurateShooter.com
